I've been painting AGAIN! I think I will have to call 2013 the year of painting posts here on highpointcircle. This is my 143rd post and I've shown you projects I've painted such as lamps, furniture, doors, etc. but I've shown very few painted signage or pictures. Funny thing is, I'm not really a painter either, that's the strangest thing! BUT, this IS another post about a "Saying Sign" I just did for my sister (hereinafter referred to as Sis).
The Background
Sis had been out shopping with her girlfriends and one of them bought a "Saying Sign" that Sis admired. She graciously let her friend have first dibs and knew I would paint one for her in custom colors and sized to meet her space. So, being the wonderful sister I am, I did. Here's how I did this one ('cause you know I try a different method each time I do one. If you don't remember look here for the other baby signs I've done this year.)
Here's the one her friend purchased (nice manicure)...
And here's the one I painted for my Sis...
Now, for those of you who like to know the process I used to get to that final sign, I'll be happy to show you.
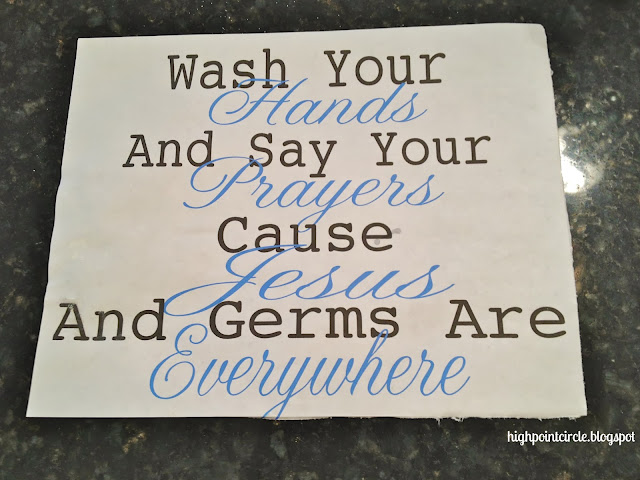
First I designed it with my Silhouette program...
Sis' sign is a bit smaller than the original and I was having trouble fitting it on an 8X10 canvas when the idea hit to overlap the cursive on the printing. That is why the blue color is on the design at this stage--I needed to see the contrast. Next I printed a mirror image of the design and changed all of the blue words back to black for transferring onto the canvas.
Here's how I transferred the design to the primed canvas...
I positioned the design on the canvas and taped it at the top. I then dipped my fingers in a water bowl and moistened the printed image just enough to wet it through. I checked to see if any transfer was happening and it wasn't. I then took a crochet hook that I had with my paint brushes (why it was there, I have no idea) and used it as a stylus to go over the letters and it worked! I was a little surprised!
Here is the transferred design...
I let the canvas dry at this point and then began to paint the letters...
I show you this picture to point out the difference between a cheap brush and a good brush. I had picked up a package of brushes at Micheal's for a different project and thought I'd use one of them here. I painted the first line and switched to my good "old" brush. Wow, I could not believe the difference in how the paint flowed off of a good brush. My brushes are 28 years old!
Here is a close-up of the difference
From this point on the process is obvious...here are all of the printed words done.
And then, I dropped my paint brush...
I just used the same brush with some background paint and cleaned-up my errors and painted the cursive words and it's done!
Here it is in Sis' bathroom...
THANKS for stopping by and THANKS for all the kind comments from last week. I LOVE reading them.
Robin
Linking Up With
Coastal Charm
Cedar Hill Ranch
My Uncommon Slice of Suburbia
Mod Vintage Life
Home Stories A to Z
The Dedicated House
Savvy Southern Style
The Brambleberry Cottage
French Country Cottage
Common Ground
From My Front Porch to Yours
Homemaker On A Dime
Coastal Charm
The Farmhouse Porch
Coastal Charm
Cedar Hill Ranch
My Uncommon Slice of Suburbia
Mod Vintage Life
Home Stories A to Z
The Dedicated House
Savvy Southern Style
The Brambleberry Cottage
French Country Cottage
Common Ground
From My Front Porch to Yours
Homemaker On A Dime
Coastal Charm
The Farmhouse Porch


Robin, that is just awesome!
ReplyDeleteWhat a neat sign! You should have an Etsy shop!
I bet lots of people would buy that amazing sign.
I love the sentiment, so CUTE!!!!
Have a really good day!!
Well, thank you very much. Maybe I'll consider that Etsy shop.
ReplyDeleteGreat canvas...you did a fantastic job and just love that quote!!!!...Have a wonderful weekend!
ReplyDeleteIt was a busy weekend and I'm glad you liked my project this week! Thanks for the visit
ReplyDelete